用 Koa2 写 GET、POST 测试接口

  刚接触 Koa2 框架,用 Koa2 写一下 GET 和 POST 接口,平常开发中可以测试使用。

1、新建文件夹,并初始化

1
2
3
mkdir koa2-demo
cd koa2-demo
npm init -y

2、安装 koa、koa-router

1
npm i koa koa-router koa-bodyparser -S

3、新增 app.js

  通过vim app.js命令创建 app.js 文件并保存。代码见:koa-get-post-demo/app.js

1
2
3
4
5
6
7
8
9
10
11
12
13
14
15
16
17
18
19
20
21
22
23
24
25
26
27
28
29
30
31
32
33
34
35
36
37
38
39
// 引入模块
const Koa = require('koa')
const router = require('koa-router')() // 引入并实例化
const bodyParser = require('koa-bodyparser')

// 实例化
const app = new Koa()
// 配置中间件,通过 bodyParser 获取 post 请求传递过来的参数
app.use(bodyParser())

// GET 接口
router.get('/news', ctx => {
const { search } = ctx.query
ctx.body = {
time: new Date(),
data: [
{
title: `新闻标题 1 - ${ search }`
},
{
title: `新闻标题 2 - ${ search }`
}
]
}
})

// POST 接口
router.post('/say', ctx => {
const { name } = ctx.request.body
ctx.body = {
time: new Date(),
reply: `Hello ${ name }!`
}
})

app.use(router.routes()) // 启动路由
app.listen(3000, () => {
console.log('Server is running on 3000')
}) // 启动服务

4、启动服务

1
node app.js

  访问 http://localhost:3000/news?search=科技 查看效果。

  启动服务推荐使用nodemon —— node 自动编译
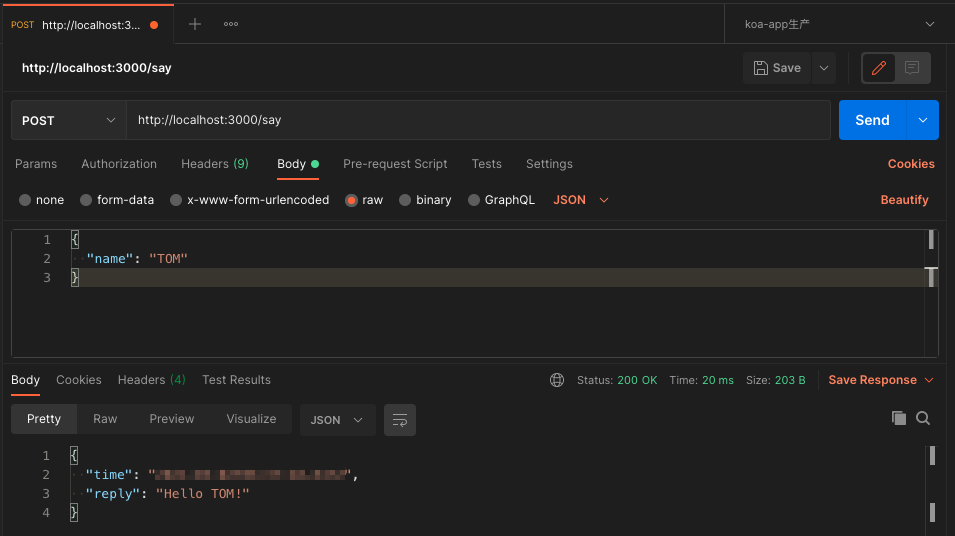
5、测试

以上

随笔标题:用 Koa2 写 GET、POST 测试接口

随笔作者:刘先玉

发布时间:2020年02月02日 - 23:21:42

最后更新:2020年02月02日 - 23:21:42

原文链接:https://liuxianyu.cn/article/koa-get-post.html